


Compared with the use of reflectors, professional-grade fill light can fully control the power output and angle (even the color), and has higher maneuverability.
Just adjust the power of the fill light to change the contrast of shadows, highlights and midtones
You still need to start by setting the main light source first. Place the main light source at the desired position, and then set the desired exposure. In this example we start at f/8. (Note: The main light source is metered at f/8, which means that if you set the aperture to f/8 and set the appropriate shutter speed, you will get the “correct” exposure. This can be used to indicate the intensity of the light source)
Place the main light source and soft box at 45°
After the metering is completed, place the fill light at a position that will affect the shadow, and then set the power output of the fill light so that the fill light is underexposed relative to the main light source. The degree of underexposure depends entirely on your needs.
For example, the metering of the main light is f/8. If you want a weaker shadow effect, you can try to set the fill light to f/4.
Set up the fill light and adjust its output power so that it is two stops lower than the main light source. In the next step, you can take a trial shot and observe the shooting results to determine whether it meets your needs and make corresponding adjustments.

Before and after using the fill light. It can be seen that the fill light effectively improves the exposure of the shadow part
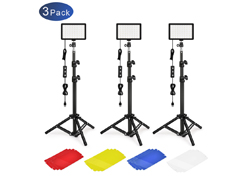
You can also design the shape of the fill light according to your needs, change their size and shape (for example, use a variety of lampshades), or even change the color.
Trying to use multiple fill lights is also a good solution. You can illuminate your subject from both sides at the same time. You can also use fill lights and reflectors together to obtain fill lights of different intensities from various angles. Use multiple fill light to obtain “all-round” fill light
You can do whatever you want to do-limiting you should only be the equipment you have, not the limitations of your ideas. Next, I will summarize some general techniques for filling light.
Fill light skills
Control the shadows, weaken the shadows, rather than completely eliminate them. This is not an “iron law” that must be followed, but an image that retains a certain contrast usually looks more natural and “pleasing to the eye”.
Pay attention to the light in the eyes. When you use an additional light source, it may mean that extra catch light will be created in the eyes of your subject-trust me, this will make the viewer feel very awkward.
Don’t get too entangled in the light ratio. Light ratio is a very useful reference value, based on them, you can get the effect you want more quickly-but they are just a means, not an end. You only need a photo that meets your expectations, not a photo that strictly adheres to the 2:1/4:1 light ratio. Some subtle adjustments often have a good effect.
Any light source can be used. Don’t limit your thinking. In a natural environment, you can use flash to fill in the shadows in the natural environment, of course, you can also reverse it-in an environment dominated by artificial light sources, you can also use natural light to fill in the light.
Post time: May-08-2021 BACK